
Have you ever needed to print out a list of files in a folder or USB drive for eDiscovery purposes or because you needed a record of those computer files? You probably brought up Windows Explorer, hit the Print Screen button on your keyboard, pasted the captured image in a blank Word document, gone back to the folder to scroll up to the next set of files, hit Print Screen again, etc. Printing file lists shouldn’t be this hard. Imagine doing that for every folder, subfolder, and sub-subfolder in an external drive. Aside from time-consuming, this method also doesn’t give you important information, like the path a file is in.
A better workaround is to use the Windows Search Tool and a little-known command for getting the full path.
- Browse to the top level of the folder or device for which you want a list of files and enter “*.*” (without the quotation marks) to do a wildcard search. This will bring up all files.


Wildcard search in Windows to pull up all files and folders
- After the search results come up, press Ctrl-A to select all the content (files and folders).
- Next, hold down the Shift Key and Right Click on the selected files to bring up the context menu. Holding Shift while right-clicking brings up options that you will never see if you just right click. So shifting is critical here.
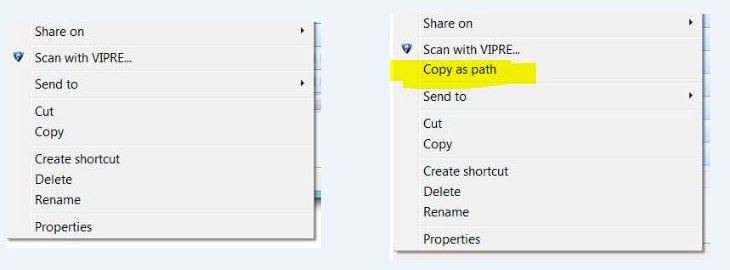

Windows Explorer Context Menus, standard and Shift+Right-Click version
- Select the Copy as path option that you get by holding down Shift when you right click.
- Paste into Notepad or into Excel. The results can be formatted and printed, and will include file names with full directory paths, as shown below.


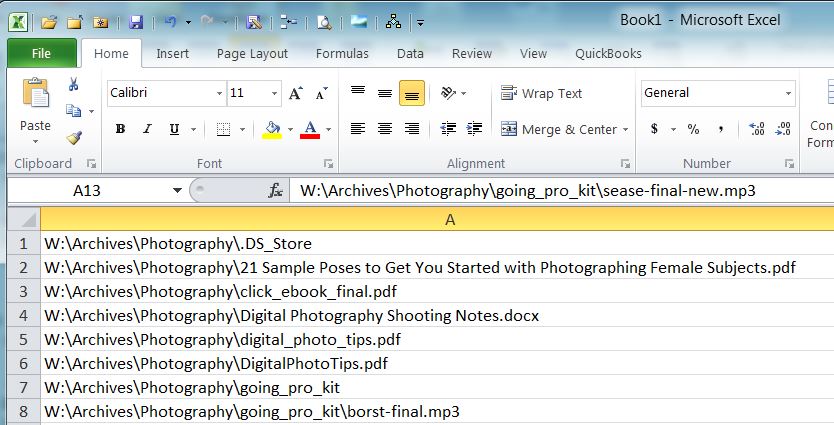
List of files with directory paths, in Excel.
Unfortunately, you don’t get other information you may need, like file dates and sizes. For more file information, consider using the DOS Directory dir command with a few useful switches.
- Click the Windows Key + R to activate the Run command and enter cmd to launch a DOS command window.
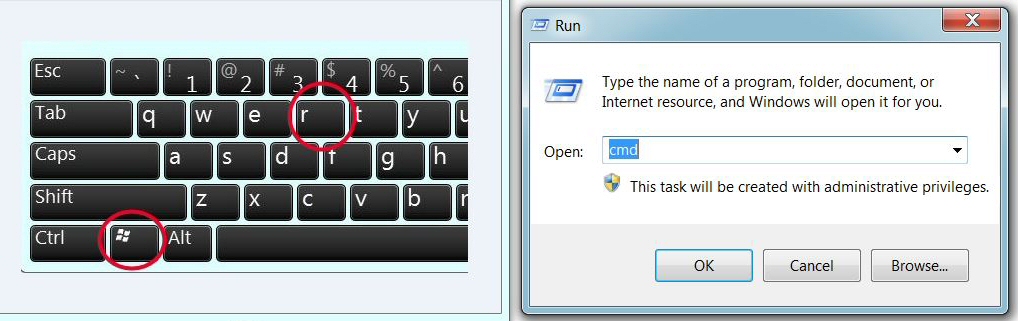

Launch Run command and type cmd for DOS
- At the DOS prompt, change directories to the top level folder for which you want file listings. This may be a 2-step process. If the folder is in a different drive, begin by typing that drive letter followed by a colon. For example, if you want file information for a folder in your E:\ drive and the DOS window reads C:\User\Yourname>, then you are in your user directory and need to first switch to the new drive. So after the prompt, type: E: and press Enter. The DOS command line will switch from C:\User\Yourname>E: to E:\>. Then type cd (for “change directory”) plus the full path of the top level folder for which you want directory information and press enter. Ex: E:\>cd E:\Folder\Subfolder
- Now that you are in the correct directory in DOS, type the following command after the prompt> dir /s /o:gn>c:\list.txt (This is the directory command. The switches tell the command to include subdirectories and to organize the output by subfolder (“g” for Group) and then by filename (“n”). The “>c:\list.txt” command at the end tells DOS to output the results to a file called list.txt and to save that file to your C:\ drive. Note that you can select another location path for the output file, and as a rule, you should avoid saving files to the C:\ root. C:\Temp is a good alternative. Create a Temp folder in your C:\ drive if you don’t already have one. The resulting list.txt file will look something like this:
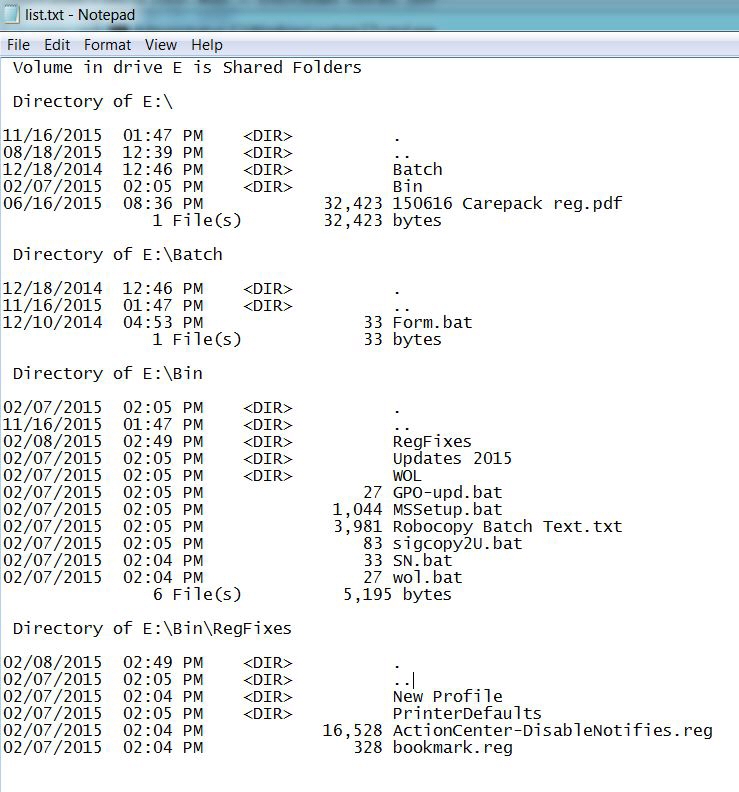
Sample file list from DOS dir command
These free tools will meet most users’ needs. However, if you want more comprehensive statistics and more control over the output, an excellent low-cost tool is Directory Lister Pro from KRKSoft.com. As of this writing, the cost for the versatile Pro version was only $29. This is an elegant little program that will allow you to see at a glance what types of files are stored in the directory, to decide what information should be outputted, and to save the information in a number of useful filetypes, including in HTML format with links to each file. The program comes with a 30-day free trial.
If printing file lists is a task you need to do often, give these methods a try. They’ll simplify IT for you.


Leave a Reply